Monitor Other People Image Files over Network
In our this detailed tutorial we are going to learn how attacker’s attacks on our devices and steal our personal images and how they make trouble in our personal life. To learn this dangerous technique completely please read till the end. Then we also learn how we can protect ourselves from this kind of attacks.
How attackers do it?
We will try this on our own environment and own network and try to steal private images of other devices from the Kali Linux environment.
First, we open our ettercap graphical interface by using the following command:
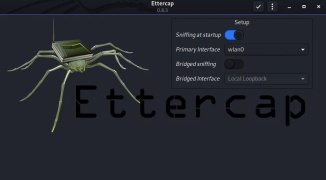
ettercap -GAfter using this command we can see our ettercap window as the following screenshot:
Then we click on the symbol to start the unified scanning. Hereby default the network interface is wlan0 means Wi-Fi networks. If we want to scan on ethernet then we need to choose eth0. In this tutorial, we sniff over Wi-Fi so we go with the default one.
Then we search for hosts we click on ፧ (3 dot menu) > Hosts > Scan for hosts
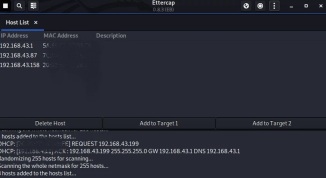
It will scan all connected devices on our local network. Now we click on hosts list on the host menu and ettercap will show us connected devices in our same Wi-Fi network. The screenshot is following:
Here in the above screenshot, we can see our router(the first one) and all other connected devices. It doesn’t include our Kali Linux device ettercap filtered it because we don’t need put own machine in Target list.
Now we add the router’s IP on the Target 1 and other IPs in the Target 2.
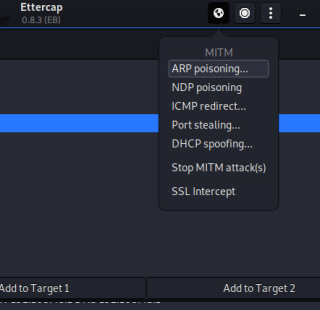
Then we click on the MITM menu and choose ARP poisoning.
Then a popup box comes for optional parameters here we on the Sniff remote connection box and click on OK.
Then we minimize all the sniffing works and open another terminal to run driftnet. A driftnet is a tool that can capture and save images from a network.
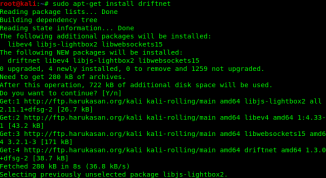
First, we need to install driftnet, so we open our Kali Linux terminal and type following command:
sudo apt-get install driftnetThe screenshot of the command is following
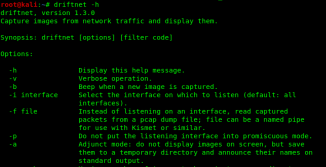
After installing drifnet we check it’s helped by using -h flag.
driftnet -hNow we start this tool by applying the following command:
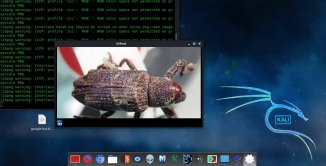
driftnet -i wlan0Then the tool will be started and will start capturing images from other locally connected devices if they surfing images in any http website.
If we need to save an image then we just need to click on it and the image file will be saved on our current working directory.
Or we can save those images on a specified directory, to do that we create a directory named sniff in our home directory then run driftnet by using the following command:
driftnet -d sniff -a -i wlan0Here -d flag is for the directory where we want to save our images and -a flag is for append this flag will save the images one by one.
Even we can sniff streamed audio of connected devices by using -s and -S flags.
This attack technique works only when the victim and attacker are in the same network and victim browses a website with HTTP protocol. The modern websites come with HTTPS. HTTPS is HTTP protocol with SSL encryption. That’s why driftnet tool can’t show them.
How to protect ourselves from this attack?
This is how we can save ourselves from this kind of cyberattacks.
- By monitoring our local network we can save us from this kind of attacks. First, we make sure that the attacker can’t compromise our Wi-Fi network.
- If the attacker is not in our network then this kind of sniffing attacks wouldn’t work.
- We also shouldn’t join any public Wi-Fi network.
- We should stop using open text protocols like FTP, HTTP, IMAP, Telnet, and SNMP V1 and V2.
- To save ourselves we can turn off network identification broadcasts, if possible, restrict the network to authorized users in order to protect the network from being discovered with sniffing tools.
Feel free to leave a comment below or reach me on Whatsapp @rajkinningar
Credit : Spyboy


-01.jpeg)
Comments
Post a Comment
Please write your comments, suggestions and feedback.